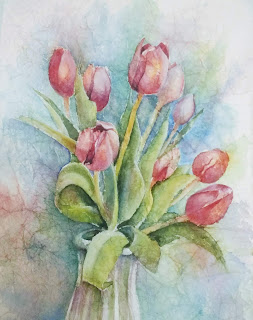
We started another masa paper project. The basics have been posted in previous blogs.
I just wanted to add some things I've learned.
After finishing most of the painting - I like to paint a lot before adhering it to another surface - I'm ready to glue it to a surface. In the past I've used Alene's glue or matte medium. This time I wanted to try YES paste. This is not cheap, but it is archival, and book binders use it.
YES paste is very thick, and looks a bit like petroleum jelly, only thicker. It can be thinned, but I decided to use it the way it came from the jar. Using a wide blade palette knife, I scooped it out onto my surface. (You can put this on any archival surface: watercolor paper, art board, treated wood panels, canvas board,etc. ) I then used a squeegie to spread it around.
I set the masa painting over the glued surface, centering it, then pressed gently. When it was in place, I set wax paper over it all and, starting in the center and working outward, I used a roller to flatten and remove air pockets.
I was pretty pleased that my paper did not buckle because there is little moisture in the paste. It dried much faster, and I was able to continue to work on the painting sooner.
PS: I ordered YES paste from dickblick.com and it cost about $12 for a pint.
FINISHING A PAINTING

You can continue to work on your painting even after mounting. You can very gently lift areas, add more paint, etc. If you have tiny details, you may want to use some watercolor pencil to define those areas. Or pen and ink. On the picture above I did use some goauche white to calm down some areas.
If you feel like you've totally lost an area, try this to reclaim it: use some scrap of masa paper cut or torn into a shape you need, paste it over the overworked or unwanted area with glue or matte medium, and when it is dry, repaint it.

No comments:
Post a Comment