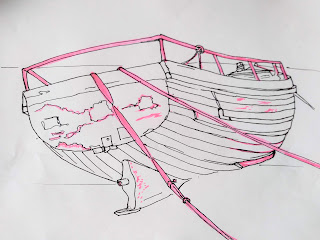
Next week we start to put into practice some of the things we talked about last week. It looks a little complicated, but you can do this. I chose it for its simplicity of shape; using masking fluid; creating a wash; and texture practice.
You have a sketch of this boat. I found this photo on paint my photo by a photographer named Lydon. First job is to carefully sketch this on your paper. You can use a light box or sunny window to trace it. Or you can use a graphite paper. Use a normal pencil, but don't draw with pressure. Pressure will score the surface of the paper.
If you use graphite paper (also called Saral), tape your picture on the paper. Then use a colored ball point pen and trace over the drawing. (A colored pen will help you see whether you have transfered all the lines)
TIP: When the drawing is complete, roll an eraser over it to remove loose graphite. In this painting, the paint will be pretty dark. But if this were a pale flower or skin, you would want your lines to be pale. Once you have put paint over pencil, you cannot erase it.
STEP 2:
In class we practiced using masking fluid. I'll just review:
*Use a dedicated small brush, cheapie. You'll never be able to use it for anything else.
*Wet and soap the bristles.
*Pour a little masking fluid into a small lid (like a milk bottle lid)
*Dip your brush into the fluid and paint it onto DRY paper
*Dry completely
*You will probably have to resoap the brush now and then.
Use masking fluid on the parts of this picture I've marked in pink.
STEP 3:
I gave each person a small version of the sketch. Use pencil to shade your small picture. I want you to really see the values in your painting. Turning your color picture to black and white can really help see values.
STEP 4:
Get to know this picture. Compare the sketch to the reference. Be sure you understand what each part is. Feel free to make corrections, simplify, and modify the drawing.


No comments:
Post a Comment