Thursday, August 24, 2023

Gel Print Photo Transfers

 I have to admit, this is one of the most frustrating processes I have tried. The Youtubes make it look so easy! But there are so many variables:  type of paper, type of paint, type of gel press (hand made or manufactured), weather, humidity, etc. And not every magazine will make a successful transfer. So it can be very frustrating. But when it's successful, it's like magic. (When really, it's science)

I'm going to attach two youtubes about photo transfer, since they explain the process better on video than I can with words. But I also want to talk about my experience, which might help you.

PREPARING A PHOTO TO TRANSFER

What works best is a photo copied on a LASER printer that has very distinct value changes. Black and white seems to work better than color. The white of the paper will suck up the paint and the darks will tend to resist the paint, leaving the darks on the plate and lifting off the paint where it will be light. The carbon from the laser print is responsible for this reaction.

I took photos that I thought would work, put them in my Notanizer ap, and turned them into two value notans. I printed them in 5 x 7, which seems to be more successful than some of my larger tries.

Here are some examples of the original photo with the Notan version:


PAINTS

Some seemed to work better than others. I had more luck with heavy body paints.
One night I couldn't get anything to work. The next day I realized the problem: it was hot outside, we had the air conditioning on, and the ceiling fan was just four feet above where I was working, which caused the paint to dry out before I could get a successful print. I even tried the open acrylics, but they also dried in these circumstances. 

You need to use a dark paint. I found black, brown, and even red worked pretty well. And purples.

You need to use a light coat. This takes practice on these image transfers. Too much paint, and it's a mess. Too little paint on the plate , and it dries before it can transfer. 

The videos show the artist putting dabs of paint directly on the plate and then smoothing it out with a brayer. But sometimes, the paint seemed to be not as evenly covered in some spots. So you might try putting the paint on your brayer first (on the side) and then putting it on the plate. 

GEL PLATE

The homemade plate is a bit stickier, but I had just as much success on it as I did with the purchased plate.
However, the purchased plate, which is harder, seems to have a smoother surface, while the homemade plate tended to get little imperfections in it.


PRACTICAL STUFF

I used white butcher paper underneath the gel plate to keep it clean and to provide a white surface to see color better. Much easier clean-up.

Use baby wipes and hand sanitizer to keep the plate clean when you are finished or between colors.

Make a "register" to help you line up your prints. It should be the same size as your print paper.
I lay mine underneath the white butcher paper, and I can see through it. This is especially helpful if you are doing extra layers on the first print, and want to line it up.  This one shows 3 sizes: 5 x 7, 8 x 10, and 8 1/2 by 11.


Below are some of the more successful prints:

Brown heavy body paint; homemade gel plate; on copy paper


Brown heavy body acrylic; homemade gel plate; copy paper


red heavy body acrylic; Gel Press brand plate 8 x 10; copy paper


purple heavy body paint; Gel Press plate; on Watercolor paper


Brown heavy body paint; 5 x 7 purchased gel plate; card stock


Here are the video instructions:

Froyle Art


More from Froyle Art...some fun ideas


7 minute video with some extra elements: Nitsa Creative


Sunday, August 20, 2023

Monoprinting on Gel Plate


Gel plate printing has been around a while, but I am just now "discovering" ways to use it. People use it to create papers for scrapbooking and collage, and just as an interesting stand alone piece of art. It is also used for photo transfers, which I'll talk about in the next blog.

Gel printing requires a gel press (plate) which you can make or purchase. There are a variety of mediums you can use: any type of acrylic, water color, or inks. (Inks, however, tend to stain the plate).

You can purchase one, about $26 from Amazon for an 8 x 10


https://www.amazon.com/gp/aw/d/B01GOO7HL0/?_encoding=UTF8&pd_rd_plhdr=t&aaxitk=ea6c0f85b52da5c799e1a9eab234998e&hsa_cr_id=3439662520801&qid=1692557393&sr=1-2-9e67e56a-6f64-441f-a281-df67fc737124&ref_=sbx_be_s_sparkle_mcd_asin_1_img&pd_rd_w=tixmo&content-id=amzn1.sym.cd95889f-432f-43a7-8ec8-833616493f4a%3Aamzn1.sym.cd95889f-432f-43a7-8ec8-833616493f4a&pf_rd_p=cd95889f-432f-43a7-8ec8-833616493f4a&pf_rd_r=H3YJ8CWJ64G19100JVJD&pd_rd_wg=Qbekg&pd_rd_r=1445ac36-9499-4ea6-9b14-102c519c7a2a&th=1


Making your own is possible and cheaper. I tried it using the following directions:

https://www.google.com/search?q=make+your+own+gel+plates+youtube&rlz=1CATRIY_enUS965&oq=make+your+own+gel+plates+youtube&gs_lcrp=EgZjaHJvbWUyBggAEEUYOTIHCAEQIRigAdIBDjEwMjQ3NjUwNGowajE1qAIAsAIA&sourceid=chrome&ie=UTF-8#fpstate=ive&vld=cid:efa94072,vid:sfifEFKjP7s

Here is The Frugal Crafter's version. You'll see lots of versions, some with alcohol, some with all glycerin. Hers is a bit cheaper bc glycerin is more expensive than alcohol.

https://www.youtube.com/watch?v=h9taUh073vQ

The hardest part for me was removing it from the mold. If you have a nice silicon mold it will remove easier. I ended up taking my large one and cutting it up into smaller sizes. The 5 x 7 size will probably be most used in making cards. The larger sizes for making backgrounds for paintings.

Generally you use one with a brayer, acrylic paints, and stencils or other items to make impressions into the paint on the plate. You don't want to have very thick paint. Apply it with a brayer; add stencil on top; put your paper on top of it all and rub gently with your fingers. (Rubbing with fingers on a stencil gets more of the paint between the spaces of the stencil.) Then remove the paper...don't leave it on for a long time. 

The first technique we tried was to brayer on different types of acrylic and use a stencil, print; then remove the stencil and print a "ghost" print. The top print is on regular copy paper with a stencil; the one below is after removing the stencil from the plate.


Below is inexpensive craft acrylic on tissue paper--first with the stencil on the plate; second after removing the stencil to get a ghost print.


Below is inexpensive regular acrylic used with stencils.


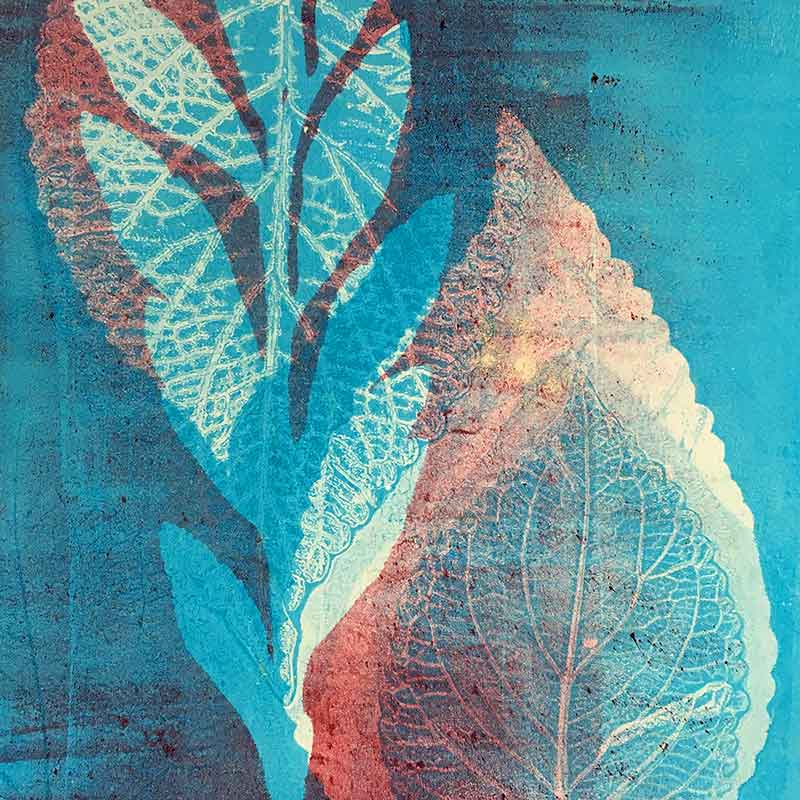
Below is on copy paper with leaf impressions.


You can purchase stencil or templates or "impressables" to use with gel plates.
You can make your own stencils easily by cutting them out of yupo or cellophane. You can use natural vine, leaves, plant parts. You can create texture with bubble wrap, saran wrap, baby powder, burlap, or anything you can think of.

Of all the paints we tried, I like the cheap-o craft paints for most things. But if I want to take my time to create textures, the open acrylics allowed more drying time.

Other than the gel plate, the supplies are simple. You need a brayer to apply the paint; paper towels to wipe excess paint from the brayer; some kind of paint or ink; any kind of paper you want to experiment with; and baby wipes or hand sanitizer to keep the gel plate clean. 

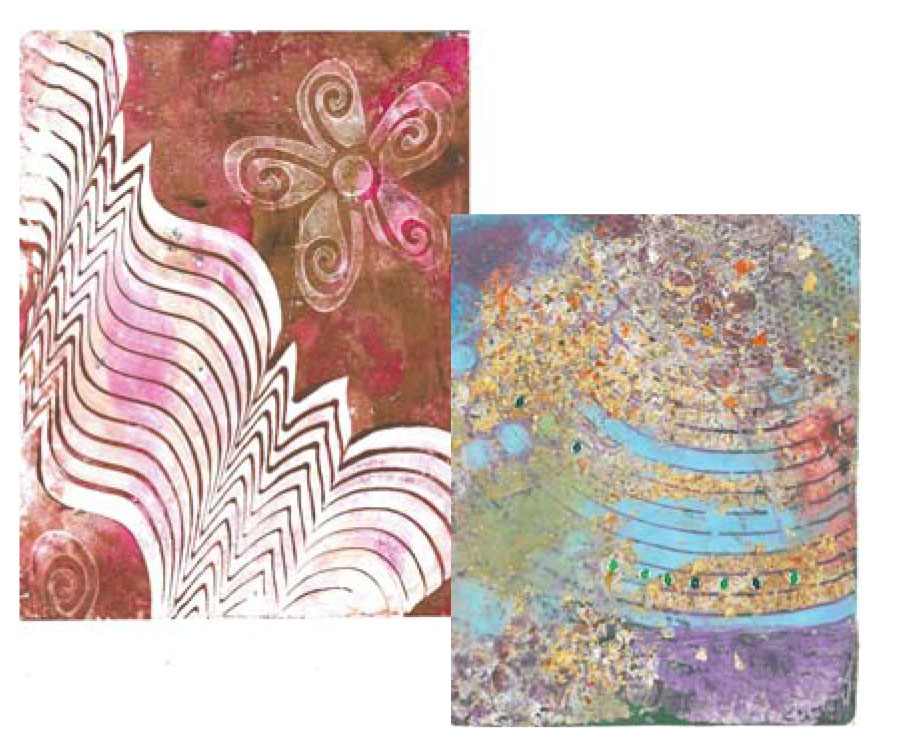
Below are some examples (from the internet, not mine) of ideas to use.


Kim Herringe, printmaker 


This tells what types of paints/inks to use, and emphasizes NOT to use glossy or printer paper.

Sunday, August 13, 2023

Monoprinting with Watercolor made simple


Monoprinting with watercolor

A monoprint is just what it says...mono, meaning one. You get one print from your plate, sometimes one or two "ghost" prints, which are lighter and pick up less paint.

Why do a monoprint, when the whole point of "printing" is to get multiple images from one plate?

Let's look at the process before I answer that.

Supplies you need are very simple, and you probably have around the house:

1. A clear "plate": that could be plexiglas, stretched plastic wrap, glass, yupo, or, as I've used here, a cheap cutting mat from the Dollar Tree.

2. Tube watercolors

3. A small brush, not too soft or floppy

4. tray of water

5. towel

6. a pile or tablet of inexpensive newsprint

7. printing papers....this can be watercolor, card stock, masa, or just about any paper you want to try.

8. A drawing to set under the plate.

9. Alcohol to clean the plate.

When I used plexiglas, I "roughed" it up a bit using steel wool. I need a plate that is slick enough to release the paint but with enough tack to hold the paint on until ready to print.


Step one: Clean the plate with alcohol to get rid of any oils that might keep the paint from sticking.
Step two: Put your drawing underneath the clear plate and tape it to the back.

Paint directly onto the plate using watercolor straight from the tube. Little or no water.
Allow it to dry completely. You can dry on a cool blow dryer if needed.

Cut the paper you want to print on to the size you want. Soak paper in a tray, then place inside a towel to absorb excess water. You want it wet, but not shiny.

Open your tablet of newsprint and set your painted plate inside.


Lay the damp paper over the painted plate, and gently pat onto paint.
Close the tablet and gently rub with your hand to encourage the paint onto the print paper.
You CAN use a brayer, but sometimes it puts too much pressure and smears the paint.


Your first print should be very colorful. Textures depend on what paper you have chosen to print on. We used print paper, copy paper, rice paper, and masa paper.
Below is the first print on the left. Second or "ghost" print in the middle; third ghost print on the right.


If you have letters or numbers on your picture, remember they will be printed backward, so you will have to paint them in reverse.

Here is a blue bird that I did a monoprint of.


Sunflowers on inexpensive watercolor paper and on card stock.


Cowboy Bob


Monoprinting on Yupo

In spite of the fact that paint on yupo slips and slides, it's not as much as on a plexiglas. So you CAN prepare a print on it without going directly from the tube, as long as the paint is fairly thick.
You can do it just as you would on plexiglas, but you can't see through it (unless you get the transparent kind), so you might have to draw first.

But there's another way to do this. You can cover your entire piece of yupo with paint and let it dry.
Then, using water and a fine brush, remove paint to create whites. 


Then continue to paint in details where you want them. 


Use the same process for wetting and blotting your paper and rubbing to make the print come off.
A brayer works on this better than the other kind for some reason. 

Below you can see the painted yupo, the first print and the ghost print .


So back to the original question...Why would you bother to do a monoprint?

Some people use it to experiment quickly with color combinations before they commit to a larger more complicated piece. You can use it to make cards that you want to be original. You don't have to keep drawing it over and over again, because the drawing is taped to the back of the plate, and you can always see it. 

A monoprint can be an original unique piece of art itself. You can easily make changes on it by wiping mistakes off the plate with water. and can use it without a drawing to be completely expressive. You can use it for the base of a pen and watercolor painting, especially some of the ghost prints. 
 Also, you can use extremely inexpensive materials. You don't need super high quality watercolor paper to get an attractive result


Friday, August 4, 2023

Dragonflies

 Dragonflies


DRAGONFLIES

I was wandering through Louise DeMasi's old posts and found a whimsicle painting of dragonflies. I loved how loose they looked, and I have a fondness for pen and ink. Hers was the inspiration for this. However, I used for reference photos from Unsplash from Kalai Venthan and Jude Infantarie.

This can be done with background last or first, and I'm showing it both ways.

Background Last

Draw your dragonflies, then go over them with waterproof ink. Be sure to vary the line sizes, some thick, some thin. I also wanted to leave some space around the wings (that is, don't completely enclose the wing) because I wanted it to have some feeling of movement. ERASE pencil lines.

I did the wings wet into wet, using just 3 colors (also in Louise DeMasi's tutorial). I like magenta, yellow, and pthalo blue. (I hardly ever use pthalo because it stains, but I don't need to do any lifting, so I felt free to use it here.)  Choose your own color combination. Start with a color you absolutely love, and choose 2 others that will go well with it.

Wet one wing, damp, no puddles. Drop in one of your colors (I started with yellow), then drop in another to blend on the paper. Try to avoid putting 2 colors together that will make a brown or gray.  Leave white space in the wings.

Continue painting the wings, wetting above or below and allowing some of the paint to flow into background areas.


When the wings are dry, paint the body. The wings should look wispy and dreamy, but the body is hard edged. Take your time and paint a section at a time. Wet the section, then with a small brush, apply the paint on one side and let the water move it to the other side. You are trying to make a rounded effect. If at first you don't get it, let it dry, and glaze over it again. 

Be fun and colorful. After all, whatever crazy colors you might choose, Nature can always make it crazier.


To make the background, Wet a section with a large brush, and drop the same colors into it, allowing them to run and bleed together. In this one, I chose to put saran wrap over it to create texture, but you can use bubble wrap, salt, a spray if you choose.


BACKGROUND FIRST

Draw your dragonflies, then ink them in, using different widths of pen. Also remember to ERASE all pencil lines.

Wet the paper with a large brush. Drop in some of your chosen colors, letting them bleed together. You can encourage the paint to move with a spray bottle also. On this one, I didn't use any texture, but while the paint is wet you can texture with wrap, bubble wrap, etc.


After it is dry, work on the wings, same as above.


Then work on the body parts, as above. Try to make these more solid looking.


When dry, go ahead and make any corrections and additions with pen, if you choose. Also, be sure that your colors have balance...if there is pink on the wing, be sure to carry a bit of that color on the other side.
My preference, after doing them both, was the second one, where you do the background first.


Saturday, June 24, 2023

Sea Turtle revisited

SEA TURTLE REVISITED


Here is the photo reference I took from Unsplash taken by Randall Ruiz.
I loved the effect of the turtle skimming over the bottom of a reef, and wanted to get that in my painting. 
I also loved the glow of light in the bottom.


I had several objectives when teaching this:

1. Get the feeling of water over rocks without using salt or plastic wrap.
2. Show how to preserve shapes with contact paper
3. Try out some of my "fun" colors, like cobalt teal and Sleeping Beauty
4. Demonstrate how to do a large wash without getting hard edges.

First step was to sketch the turtle on 100% cotton paper. Hot or cold press.
(Besides preferring it, you need cotton for the contact paper to be removable without ripping your paper.)

Step 2: Cover your paper with contact paper.  (Or you can cut out the outer turtle shape on the contact paper with scissors.) Using an exacto, gently cut around the outer turtle shape. Leave the contact paper on the turtle and remove the rest. Press the edges down around it to seal.


The purpose of the contact paper is to protect the turtle shape and allow me to be as free and loose as I like on the water.

Colors: Choose three blues in the green bias range. You should have one that does not get dark, like cobalt teal, Sleeping Beauty, or fuschite. Choose another that gets medium, but not very dark, like cyan, cerulean, peacock, or manganese. For the dark, we used Prussian, a color I rarely use, but is popular with a lot of artists. You can add a little green to make it more tropical if you only have cobalt blue.

Make a puddle of each color, so that the color is ready and completely dissolved. Puddle should not be real watery, or the paint will be too light.

Have clean water ready. It can be in a spray bottle or just in a cup.

Using a larger brush, such as a 3/4 inch flat, wet the paper in the area you want to work. Don't try to do all the background at once. The secret is to keep one edge wet, and only paint up to about an inch from that edge. 

Begin by adding your light color. Apply it in short strokes, not dots or dabs. Try to keep your strokes in the same direction. You don't need to cover all the paint or blend it with the brush, the water will blend it for you. Drop in some of the medium paint color until you are happy with the effect. The dark color is added while wet to indicate the cracks in the rocks, in broken lines. I used the edge of the flat brush for the darks.
Move to the next area while you wait for the first area to dry.

NOW WATCH YOUR PAINT DRY.

When the painted part has lost its shine, but is not dry dry, spatter droplets of clean water onto the paint. It should make tiny spots, similar to a salt effect but softer. You can also spatter some more paint into it.
Don't mist or oversaturate the area. 

What water drops look like


Here are some examples of student water result. Note they are not all the same, but they all look like water.


Completely dry the background with the contact paper in place. DRY ON COOL, or stick on the back of a fan and let the air pull through. It only needs to be completely dry around the turtle so you can pull off the contact paper without tearing the paper or disturbing the paint.

THE TURTLE

Remove the contact paper.

The first thing I did was take some of the pale blue from my palette dirt, and lightly glaze over the neck and parts of the flippers and legs. I want them to appear to be in the water. I still left some white. It effectively separates the appendages from the shell.

Pale blue over neck and flippers 


Pale blue over legs where they touch the shell


Basically, I used 2 colors for the shell: Quin burnt orange and ultramarine blue. If you don't have quin burnt orange, just use burnt sienna with a bit of warm red in it. The blue and orange will create a nice dark brown.

Note the segments of the shell have a slight fan shaped pattern on each one. I did them one by one so I could recreate this effect. I wet the segment (no puddles); used a #6 brush and quin burnt orange to make radiating lines (the wet paper will soften them), then added the blue at the bottom, dark edge of the pattern. I tried to leave a soft white spot at the center of the radiant.

Leave white space in between the segments. I want this hard line, but will calm it at the end.


Don't worry, you can use water and a small brush at the end if you don't get the pattern you like. Also, they don't ALL have to look perfect...just a few with the radial pattern will give the effect to all of it

Appendages and head.

Had to use a small brush to get the tiny spots on head and flippers. Same colors as the shell, but added a little green tone here and there. Also, vary the lightness and darkness of the spots.


Making the entire shell rounded.

First I took clean water on my brush and washed over SOME of the hard white lines outlining the shell segments. This loosens some of the paint and pulls it into the crevices. You still have a hard edge, but it isn't so stark white. I still want SOME of the pure white to stay. 

I wanted the shell to look more rounded. I darkened the outer right and bottom sides of the shell (still using ultramarine blue and quin burnt orange, just darker) and had to lift some hi-lights in the center of the shell. 
(On this one, I made the mistake of trying to make one of the shell patterns have dark lines, and I
really don't like it as well as the soft ones. )