Steve Mitchell does a concise summary of the differences of hot press, cold press, and rough papers.
https://www.youtube.com/watch?v=D_AnLl0PMlo
Hot press is rolled between hot drums, so it is very smooth. Think of pressing clothes with an iron to remove wrinkles. Cold press is formed with cold drums. Rough is pressed between drums wrapped in felt to give it rougher texture.
Even among top professional papers that are cotton, there are differences in texture or weave, softness, and sizing. Sizing is a product (usually a gelatin) added to the pulp to allow the paint to sit on top of the paper and not be completely absorbed by the paper. It is what gives you control over the paint. Internal sizing is added to the pulp before it is pressed; external is added afterward. Too much sizing makes lifting easy, but makes glazing difficult.
Paper also comes in a variety of weights. The most used are 140 pound and 300 pound. Paper weight refers to the weight of a ream of paper, which is 500 sheets of paper cut to a standard size. It can be measured in either pounds (lb) or grams per square meter (gsm). In the United States, paper weight is usually measured in pounds, while outside of the US, it's usually measured in gsm.
Be careful when buying...you may mistake 140 lbs for 300 because 140 pounds is
the same as 300 gsm.
You can also purchase 90 pound paper, which is about like card stock. It does buckle
but it can fit through most printers.
The work horse is usually 100 per cent cotton cold press because it allows you to use a variety of techniques. (masking fluid, taping, scoring, etc.)
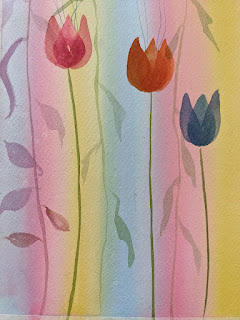
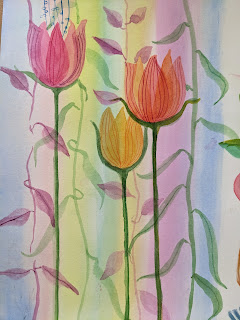
To compare, I painted the cold press on the left exactly the same as the hot on the right. (Same size, colors, etc.)
First I painted a wash of pale colors to create the background. From this I was able to compare the drying time of the papers and how well the colors blend. You can see that wash behind this painting. Do this to both hot and cold press to compare.
Observe: Drying time of papers.
Hot press dried more quickly, sometimes before I could get the paint on. I had to add more water initially and work a bit faster to get an even wash. You might notice little flecks until the paint dries, and then it leaves a smooth surface.
Blending
Even though the paper is wet, the hot press does not blend or bleed into other colors as much.
Then I painted some teardrop shaped buds, only the centers. While waiting for them to dry I painted in some stems and played with leaves. (I used a flat brush for the stems and experimented with a dagger brush on the leaves) When dry, I GLAZED over the buds on each side to see how well each glazed.
Below is the tear drop centers of flower:
Observe Glazing...does one type of paper seem better than another?
you should notice that the petals appear transparent on both types of paper.
Stems and leaves
Use the chisel tip of a flat brush to create stems. Practice using round brushes to make different types of leaves. I even used my dagger brush for long ones. Make them overlap stems for a transparent effect.
How well does it lift?
Choose some places to try lifting with a medium soft brush. Which is easier, hot or cold?
Try some fine lines with a small brush . (see on petals)
Try some pen and ink. The pen should glide over hot press, but get a little resistance from cold press.
Rachel's Studio tips on painting on hot press
https://www.youtube.com/watch?v=1At1F2pBXKg
GLAZING TIPS:
Sometimes, in order to unify a painting, it helps to glaze over an object with a color. My three favorites are:
Cobalt blue--for pushing something into the distance
Nickel azo yellow
Transparent Pyrrol Orange - for unifying reds


No comments:
Post a Comment