Saturday, September 14, 2024

Using Crescent Watercolor Board

CRESCENT WATERCOLOR BOARD

What it is:

Arches used to make a watercolor board, but has discontinued. CRESCENT now makes one. It is cold press watercolor paper that is adhered to a heavy 1/8" thick board. The crescent brand is smoother than most cold press, though. 


Advantages:

There are several reasons you might want to purchase this. One is that it does not need to be stretched or even taped down, since it is rigid and does not warp. There is no real "learning curve" to learn how to use it, because it is so similar to the paper you are accustomed to. It takes most of the techniques we love--salt, masking fluid, Saran wrap, mediums, etc. Like cold press paper, you can glaze without disturbing the bottom layer of paint.

I was pleasantly surprised the first time I used it. The colors seem very vibrant, similar to hot press paper. And the brush seems to glide over the smooth surface. 

It is lightweight to travel with, and you won't need any hard surface to put underneath or any clips to keep the wind from blowing it away. 

I would recommend, however, that you should PLAN the size of your finished product for framing. For example, if I want my frame to be 16 x 20, and want to mat this to a 12 x 16, I will use a 16 x 20 piece of board with a 16x20 mat and an opening of 12x16 (a 2" mat). This makes framing much simpler. Otherwise you have a heavy piece of board you are trying to adhere to a lighter weight mat in order to fit the larger frame. 

Disadvantages:

Cost is more than a sheet of paper. Crescent watercolor board is available from art supply stores such as Dick Blick, Jerry's Artarama, and Cheap Joe's. It costs about $11.50 for a 20 x 16. You can buy 3 packs of 8x10, (about $12) 9x12, (about $17) and 11x14. (22.46). You can purchase singles up to 30 x 40 size.

I bought one 20x16 and made it into 4 8x10's. I wouldn't recommend this, though, because the board is 1/8 thick and difficult to cut. 

I had some trouble lifting the paint. That can be remedied with lifting Prep.

Be careful that what you buy says "Watercolor Board." Crescent makes many kinds of paper AND boards, some for colored pencil, some for illustration, etc. 

Here is a short video with Steve Mitchell testing the watercolor board:

https://www.youtube.com/watch?v=Svhn3vnaYno


Finishing the 2nd version of the Heron on Canvas


Here is the finished version of the heron by the shore instead of in a marsh.
Since the background is light, I had to make adjustments to make the head stand out.
So, in addition to shading the neck, I made the beak darker and lightly outlined parts of the white head that touch the lighter sky.

I made a distant shoreline with small white marks to indicate islands where they congregate and have their nests. I added some reflection of the islands in the water. I found some references for some flying herons and added them to the sky to add some interest and improve the composition. 

I also added some pale pinks to the sky. Some ripples in the foreground water around the leg.

Here they are side by side. Two different moods, same reference.


Thursday, September 12, 2024

Painting on Watercolor Canvas - Blue Heron


There is a previous post about how I prepared the canvas to use watercolor. This one is just focused on the painting process itself.

The original reference photo was from Pixabay.


Draw/trace your picture onto the prepared canvas. If you make mistakes or get smudges from the graphite paper, use a magic eraser, dampened, to erase. A normal eraser will just smudge. 

Keep these tips in mind as you paint:

1. Put down the paint in the value and color you want the first time.
2. Using tube paints will make it easier and faster to achieve the paint consistency you need.
3. Don't use your good sable brushes. Canvas is hard on them.
4. Remember, everything can be ..and will be...lifted back to white.

This is a subject that can have any sort of background (except desert). Anywhere you find water, you can find blue herons. You can make a background of sea shore, lake shore, marsh, swamp, wetlands. Some have even been found in meadows and farmland. There are many near where I live, which is near an oxbow and the Ohio river. They like to nest in high places, like trees or island hills, away from predators.

So I left the background for you to choose.

Regardless of what you choose, the background is painted first. Paint right up to or even over the outside of the bird--you will get your whites back at the end. 

For the marshy background above, I held the canvas at an angle, vertically, to apply paints and let them run together--mostly a variety of greens and some burnt sienna, concentrating darks at the edge of the lake. I painted up to and even into the outer feathers of the bird.

When that dried, I turned the board horizontally and painted wet into wet, letting the paint run along the horizon to create the look of a pond or lake edge. 

Here is one I began using a pale, seashore background. The background is all done painted horizontally, allowing the paints to run left to right.


Painting the Heron

After the background is dry, using a small damp brush, I carefully remove paint that may have got on to beak, neck, etc. to bring it back to white.

To paint the Heron, I made a mixture of gray using French ultramarine and burnt sienna. There are many professional artists who use various strengths of this mix for grays. Add more blue if you want it grayer; more burnt sienna if you want it browner.

I treated the body of the bird, wings included, as if it were a giant football to be shaded with a medium gray. I used a bluer gray on the right side of the neck to create a shadow on the neck, like a cylinder.
When this dried, I painted a dark on the shoulder patch, the belly under the wing feathers, and part of the tail, and on the head. I used a dark made from French ultramarine and burnt sienna, but I added some pthalo blue to brighten up the color.

When dry, I used a fine brush dipped in water to remove paint to create feathers. It does not have to be a "scrub" brush, just firm enough to remove paint lightly. Very similar to the step of removing paint on the elephant on yupo. 

Legs and head

The main color I used for the legs is quin burnt orange, with yellow for hilights. You can use a warm yellow mixed with burnt sienna or red. The beak is a warm yellow with some burnt sienna in it. Use a dark mix for the black on his head and the feather extending from it. Make sure the canvas is dry when you apply these finer shapes or the paint will not be hard edges.

The eye is yellow, and after it dried, I used a fine pen to outline it, as it is too small for me to paint with accuracy. 
The leg is reflected in the pool of water. For that reflection, I painted it lighter with no hard lines. Then I ran a damp small brush through it (like water ripples) to break up the reflection a bit. 

Details in the water

I wanted it to look like water lilies in the pond. So I made some lilies using a thicker consistency of dark green, and painted right over the water with lily pads. For the pink flowers, I removed paint in the shapes of the flowers. When that was dry and back to white, I painted in the flower shapes in pink. 

**Sketcher's note on drawing lily pads: They seem big and round, but remember they are being viewed from an angle. If you want them to appear as if they are floating on the water, you will have to make them flat. They will only appear round if they are directly below you. Sorry, perspective is everywhere. 


Prove it to yourself: Make a dark dot in the center of a round lid. Take pictures of it at different distances and different angles. Notice just how flat the curves are as they touch the surface of your floor or counter. Also notice how that dark center dot is farther from the bottom of the circle than the top. At eye level, 
you can't even see the dot.
Bonus: all your friends will think you are weird for taking so many pictures of a round lid.


Finishing and framing

When you do watercolor on canvas, finishing is pretty easy. Use the Kamar Varnish spray, which we used on yupo projects. Spray a very light spray. Wait 15 min. Spray another very light spray. This "sets" the paint. (a heavier spray can move the paint, just as water would). Then you can give it a coat or two. After  it dries, test it to see if the paint moves with water. If not, you're good.

You do not need to mat this, and you can frame it without glass, as long as you have varnished it well.

Thursday, September 5, 2024

Yupo and Masa Paper Elephants

 Results from yupo and masa elephants

In today's class we finished up these two elephants. When the yupo version is finished, you have to seal it to keep it from being damaged. I typically use Krylon Kamar Varnish, which is specifically designed for watercolor. From a distance of 12-18 inches, use a light spray. Then let it dry before adding another coat of light spray. This is to SEAL it first. Then you can use a heavier spray to protect the painting. The first light coats are necessary because too heavy a spray can move the paint, just as water will.

BRAG TIME:

Here are some of the results from the yupo:

                                                       Judy


Delores


Vicki


Sylvia


Francis


Carol


Shirley


Jackie


Masa Paper results:

Sylvia


Judy


Emily


Delores


Jackie


Shirley


Some aren't finished yet, but I'll post them next time!


A little about watercolor on canvas


"Maddie by the Sea" on Arches


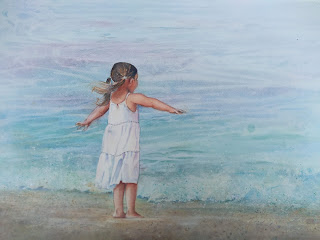
"Maddie by the Sea" on watercolor canvas


There are times when you want the look of canvas, and it can be done in watercolor. There are 4 popular options:

1. Fredrix watercolor canvas, stretched

2. Fredrix watercolor canvas, on board

3. Watercolor canvas in pads

4. Regular canvas covered with 2-3 layers of Ground


I am covering their advantages/disadvantage one by one. (Prices are Dick Blick)

1. Pre-purchased watercolor canvas, stretched.

One 9 x 12 is $19.60 

Advantage: It is ready to paint on, no waiting for product to dry.

You can buy a cheaper Masters Touch brand at Hobby Lobby.

2. Watercolor canvas board.

Advantage: Ready to paint on, no waiting for product to dry.

One 9 x 12 is $ 8.65


3. Canvas pads

10 sheets of 9 x 12 is $14.10.

You can NOT just paint on one of these sheets until it is securely mounted on board or other hard surface. It will just curl and be impossible to work with.

I use YES paste to glue it to a strong surface, such as heavy mat board or the leftover board from a block of paper. You can also use extra heavy matte Gel. Regular glue will not be strong enough. I have also used a strong spray adhesive that works very well, for about $5 a can. Purchased at Wal-Mart in craft department.Disadvantage: You have to wait for this to dry for a few hours before painting.

Advantage: Cost and only a short wait before painting

By the time you purchase the glue (about $20 for a jar that will do about 15) you have about $35 to make 10 9x12's, or $3.50 each. Plus whatever you spend for the board to mount it on.

You can also purchase this canvas on rolls, which you can stretch or mount yourself. A roll of 58" by 3 yards is $82.60. But I really don't think I would use all that in my lifetime.

4. Making your own canvas board with canvas board and ground.

   Cost of 10 9x12 regular canvas:   $15

    Cost of enough ground to cover the canvas 3 times: $18 (ground is available from Daniel Smith, QoR, Schmincke, and others. Holbein calls theirs watercolor texture paste. Schmincke calls theirs primer.)

    Total cost for 10: $33. $3.30 a piece. 

Advantage: cost; can create textures;  ready availability of regular canvas

Disadvantage: you have to wait 48-72 hours before painting on this surface. It is also more time-consuming than the others.


Transferring the sketch to canvas

You can't use your trusty light box to transfer the picture onto canvas because it is too opaque. You can use Saral, which is is a graphite paper that you put between the drawing and the canvas, then trace it. Or you can also just draw it, if you are confident. Try not to erase.
This is a rougher surface than paper, and erasures may end up smudged. If you need to erase, use a Mr. Clean magic eraser, dampened. 

Painting Process on Canvas

The process of painting on canvas can be a lot different than paper. It is hard to glaze one color over another because the paint tends to lift easier. It isn't as out of control as yupo, but you do have to be careful to paint it the value you want first. 
Learning to blend on it is harder at first. You can still do wet on wet or wet on dry. You can still use certain techniques, such as Saran wrap and some textures. Painting tiny details is hampered by the texture.
The advantage is that the paint lifts easily without making the surface look worn. Paint looks very vibrant and clean. No mounting or matting needed. Just pop into frame.

Finishing the Painting

I like to frame the canvases without mat or glass. To do that, I have to use a finishing product, such as Kamar varnish (a non-yellowing archival varnish made for watercolor).

Each type of canvas will have it's own degree of texture. Some are smoother than others.

Here are some excellent video references for watercolor canvas:


Mind of Watercolor explains watercolor canvas--about 15 min

https://www.youtube.com/watch?v=0UZ_lABXDAw


Liz Chaderton gives best tips

https://www.youtube.com/watch?v=uf1yuYyTfSs

don't expect canvas to act like paper

prepare with watercolor ground

plan--there's no way to hide, no place to cut

paint flat

don't use your best brushes on canvas

don't use too much pencil when sketching--hard to get rid of

use a magic eraser instead (wet)

be direct and get what you want the first time

don't be afraid of the water

use a spray bottle to move the paint

don't fiddle

do use textures if you want (salt, etc)

do control the water

do let it dry

stand up to paint

do be patient - takes longer than paper to dry

lift out mistakes easily

use small brush with controlled amt of water to glaze

seal and protect

varnish or Dorlands wax


30 tips from Liz Chaderton (20 min)

https://www.youtube.com/watch?v=xLAMi9mNf1U


How to prepare a canvas (6 minutes)

https://www.youtube.com/watch?v=j7yYyIrTESA&t=0s