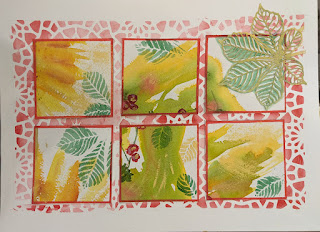
CREATING BACKGROUNDS BEFORE YOU SKETCH
We started this session with a fun free-for-all, using all kinds of textures to create backgrounds.
First, however, we made thumbnail sketches (about 2 " by 1.5) with simple patterns or designs, no lines, just shapes. About 1/3 should be left white. You should see a connecting path of either white or dark. Shapes should touch at least 3 edges of the paper. They looked a bit like this:
When you do your background, keep the shapes very soft edged. Use your ideas to create a general pattern In your background.
Here is a really good article by Amanda Walllace that discusses basic composition in abstract art. (cruciform, radiant, diagonal, tunnel, circular, etc.) It will give you some great ideas in creating an abstract background. If you challenge yourself to make a thumbnail using each of several of these basic compositions, you will be amazed at what you come up with.
maybe like this:
Amanda Wallace article
Playing with textures:
Some of the textures were created using: Saran wrap; bubble wrap; salt; cardboard; napkins; alcohol; combs; gauze; and Brusho.
Some of these I've talked about before, so I'll put links for them in here.
Here is a summary of a lesson done last year to show possible texture making. All are done on wet paint except for the bottom right spattering, which is done on dry then sprayed with water. When doing these techniques, remember to dry completely before removing things like salt, Saran wrap, wax paper, etc.
Here are some that were demonstrated in class: The top shows Brusho sprinkled on dry, then lightly spritzed with water. You can also dissolve some in a palette and paint it on like paint. The bottom is Brusho sprinkled onto wet paper. Some is moved around with a brush.
Here is a link to making Christmas cards with Brusho with some tips on using it.
BrushO is very staining. If something gets too dark, you can lighten it with bleach, either watered down or straight to get back to white, using a brush or Q-tip.
A link to Amazon's 8 color Brusho, about $38.
A 36 min video with tips on Brusho
Paper towel and spraying wet on wet.
Below I wet the paper, then dripped colors, tipped the paper to let them run, and then in some sections, laid paper towel over sections and gently added paint over the towel, let it sit awhile, then lifted the towel. We did discover that you should use a cheap paper towel...our beloved Viva is too absorbant and lifts the paint rather than stamping it into the paper. That is here, about minute 1-10
and alcohol are in this video:
This video shows gauze, bubbles, dip pen, and others:
This one used spattering of Miskit, blowing it with a straw, painting wet into wet , salted. When dried I removed the miskit.
This one is just Miskit. I spread it around with a credit card, and while wet, picked some of it up with a paper towel. When the masking dried, I rubbed through it with my finger to create some patterns.
THEN I painted cobalt blue and magenta. When dried I removed all the masking.
Spattered masking and dripping paint on with dropper
Loosely following this pattern.
Painted wet into wet, dropped a few drops of alcohol with a dropper, and covered with Saran Wrap.
Trying to make the background light enough to take almost any picture I want to put over it.
Here are some books I got ideas from:
Love this book if you love texture!
Another by Karlyn Holman
Here is a painting done doing the Brusho first. It actually started as a large piece of Bristol paper
that I randomly played with Brusho. I turned the paper in all directions, looking for something that I liked.
I eventually settled on this section, which was really 1/3 of the piece I started with. Then I negative painted the face area. I eventually called it "Emergence," because it felt like moving forward from a chaotic situation.
This one began as a wet wash of transparent pyrol orange, magenta, and yellow.
I sprinkled it with pretzel salt. The next step was to place the drawing over it and draw
the picture. (This is San Jose Mission in San Antonio, TX, which I visited about 18 years ago).
The next step was to paint in the shadows and darkest darks, then modify the mid tones.

After making several backgrounds, choose one you really like. Find a reference that you believe would look good over this background.
I often draw my picture on tracing paper. That way I can move it around on the background to see if it looks more interesting one way or a different way. If your background is light enough, you may be able to trace it with a window or light box. If not, you will have to use graphite paper, like Saral, to trace your image.


