After today's Zoom sessions, I just want to answer a few questions before I begin this tutorial.
Q 1: What is a good method for painting leaves?
For those struggling with painting leaves, here is a good tutorial by Louise DeMasi.
https://youtu.be/W0VqApUdDw8
Q 2: How do I share my pictures on Zoom?
Here is the reference photo:
The sketch:
Value/color study:
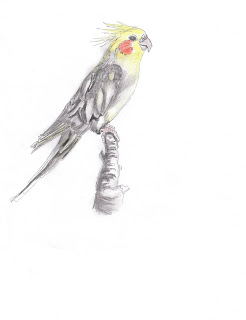
In some of our conversations, I've suggested making your line drawing and copying it several times, small sized, to do several value studies. In this case, I made several copies, made a value study, but also added the yellows where I wanted them to be. Joey is gray and yellow, so adding the color to value study wasn't much of a stretch.
To make the value study, I used a GENERALS SKETCH & WASH pencil, which can be sketched on then wet to create light to dark values. It makes the value sketch go quickly.
First step in the painting is to apply a yellow wash (I used Hansa Yellow), dark to the head, crest, and neck of the bird, making it very pale over the breast, tail, shoulder, and wings.
*I wanted a very pale yellow under painting over almost the entire bird. I will later "glaze" grays over the yellows. This is how Joey looks. He seems white and gray, but at closer inspection, you see undertones of yellow. I can't exactly "mix" gray and yellow to get the effect. I can only get it by glazing.)
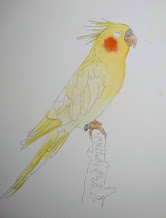
Before this could dry, I added orange to the cheek to create a soft feather look. This is accomplished wet in wet, but the trick is to have the paint/moisture on your brush less than the moisture on the paper. I don't want a backrun, but I want the paint to spread out over the cheek area.
(You apply the paint to the center of the circle and watch as it moves out. You can use a brush to encourage it in the shape you want, or a clean thirsty brush to prevent it from going farther than you want. A "thirsty" brush is one that has been in water, but has most of the water pulled out by either squeezing or drying on a sponge or paper towel. It is not completely dry)
DRY COMPLETELY.
PUT A TINY DOT OF MISKIT IN THE CENTER OF THE EYE, AND THIN WISPS OF MISKIT OVER THE CREST.
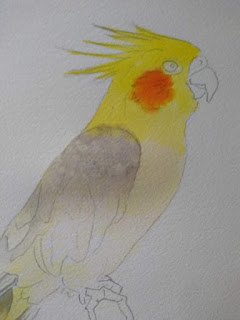 The shoulder of the bird has small soft feathers. To create this effect, I mixed a gray with French ultramarine blue and a bit of burnt sienna, and added a bit of violet.
I wet the entire wing and shoulder BUT I only applied the gray paint to the top of the shoulder and let it go only to the top of the wing. (this is so I would get a soft edge over the wing)
NOW WATCH PAINT DRY. When the gray has almost lost its shine, or just barely lost it, use a small brush to drip tiny bits of water to create tiny "blossoms" that look like feathers. If it gets too light, use the gray paint to create the blossoms.
For the beak and claws, create a flesh tone of raw sienna and pink or magenta. I painted in the eye with a "black" made from purple and burnt umber. I left a white ring around the eye. The nose is a gray. Make a dark round spot for the nostril.
I began putting a light gray wash over the body, leaving some of the flight feathers white and yellow.
The feet have a glaze of the flesh tones. When they dried I put tiny dots of burnt sienna, and darkened underneath the feet for shadow.
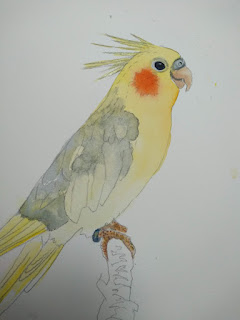
I began the process of separating the feathers. The way I usually do this is to apply the paint to the side of the hard edge, clean the brush, and with just water on the brush, soften the gray into the body. (the brush is not drippy wet, just damp enough to move the paint)
On the tail and lower wings where the feathers overlap and are close together, I skipped every other feather as I worked, so I wouldn't accidentally paint into a wet shape.
I used a damp lifting brush to lift away any areas I needed to be softer or whiter. (Such as those very white feathers.)
Since I have miskit on the crest, I could work a wet background in around the head. I wet the area around the head, dropped in cerulean blue and then dropped in quin violet.
Then I wet the section near the tail, again dropping in cerulean and some green and tiny bits of the violet. Same for the sections surrounding the stem. As the green dried, I dropped bits of water from a small brush to create blossoms.
Still haven't done the branch. And I will probably break up the green by his back wing.
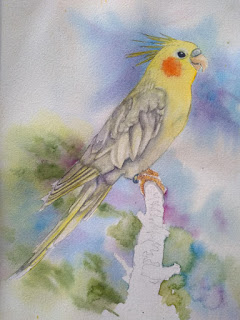
I am repainting the bird using a loose background first. This one was created using new gamboge, cerulean, and quin violet. I may choose a different background, but I will do the background first, leaving sections of white, or a "path" of white. I created some purposeful blossoms to break up some areas I thought needed some attention.


No comments:
Post a Comment