INDIVIDUAL ROCKS
In order to show different methods of creating rock, I first drew a cairn (stack of rocks used in national parks, Iceland, and other parts of the world to navigate trails in the wilderness). I made it similar to one of these (photo from unsplash, by Daniel Tellez Cabrere).


There are two or three important things to remember when painting rocks, or any object outdoors. The first is to establish your source of light, and keep it consistent throughout the painting. In this one, I chose to have the light coming from the top left. (See the pretty sun?) That means that surfaces that the light hits directly will be the lightest; areas where no light gets in are the very darkest (like the underside of the rocks). Other areas that do not receive direct sunlight are a medium value.
The second is that you need at least three values --light, medium, dark--to depict a 3D object. There are a lot of other things you can learn about light--reflected light, cast shadows, etc.--but for now, your rocks will be believable if you make sure that you have those 3 distinct values.
Miscellaneous tools used in this exercise were: salt, cut credit card, wax (from candle, crayon, or paraffin), wax paper, alcohol, sponge, and fan brush (or hog bristle brush). Colors used were mostly cobalt (or ultramarine) blue, burnt sienna, ochre, and burnt umber. Keeping it simple.
For the first rock, I just gently rubbed a stick of paraffin onto the rock surface. Then I painted a medium wash of burnt sienna and cobalt over it. When it dried, I darkened the shadow area by adding some burnt umber.

The second rock you see below was the same burnt sienna/cobalt mix with a little ochre to warm it a bit. While shiny, I added some table salt and scratched into areas with the point of a cut credit card. (Other tools can be used to do that) After it dried, I darkened the shadow underneath. Last, I sponged some green over the top left to look like moss.
The next rock also began with cobalt/burnt sienna, but a light wash first. When that was dry, I rubbed some wax over the surface, and covered it with a darker (medium value), and dropped alcohol into it while it was damp. Drops of alcohol create small circles, while streaks of it will push away paint. When dry I darkened the bottom and a little of the right side. Then spattered over dry paint.
This 4th rock was a lot of fun. I made a grayer version of the cobalt/burnt sienna mix just by adding more blue. After adding the initial coat of paint, I spattered into it while the paint is wet. I tore strips of wax paper, and lay it over the wet paint. After it was dry, I removed the wax paper, and got these lovely marks on the rock. After the entire thing was dry, I again darkened the bottom, added some lines for cracks, and did some spatter. I did add a little green moss with the sponge.
To make this bottom rock, where it meets the grass, I used a granulating paint, like lunar earth, for a medium value. I wet the bottom of the rock, leaving the very bottom 1/2 inch dry, and added dark paint about 1/2 inch above the very bottom. Using a fan brush (or hog bristle brush), I brushed the dark rock color, from top to bottom, over the grass area. That should have created some white grassy looking spaces.
I waited until the shine had gone from the paint, but it was still damp. Using the small flat side of a cut credit card, I pulled out some whites from the paint.
When the rock was dry, I completed the grass effect by painting in some greens just below the rock, and then using the fan brush, brush upward from the green into the whites left on the rock. Leave some of the whites.
I spattered and strengthened some of the cracks with a small brush.
PAINTING GROUPS OF ROCK
From left to right: Top row: The triangle method; cut wax paper over colorful wash; torn wax paper vertically over wet wash; Middle: negative painting; bottom, rock practice using salt in paynes gray; rock with wet spatter, small grouping using negative painting.
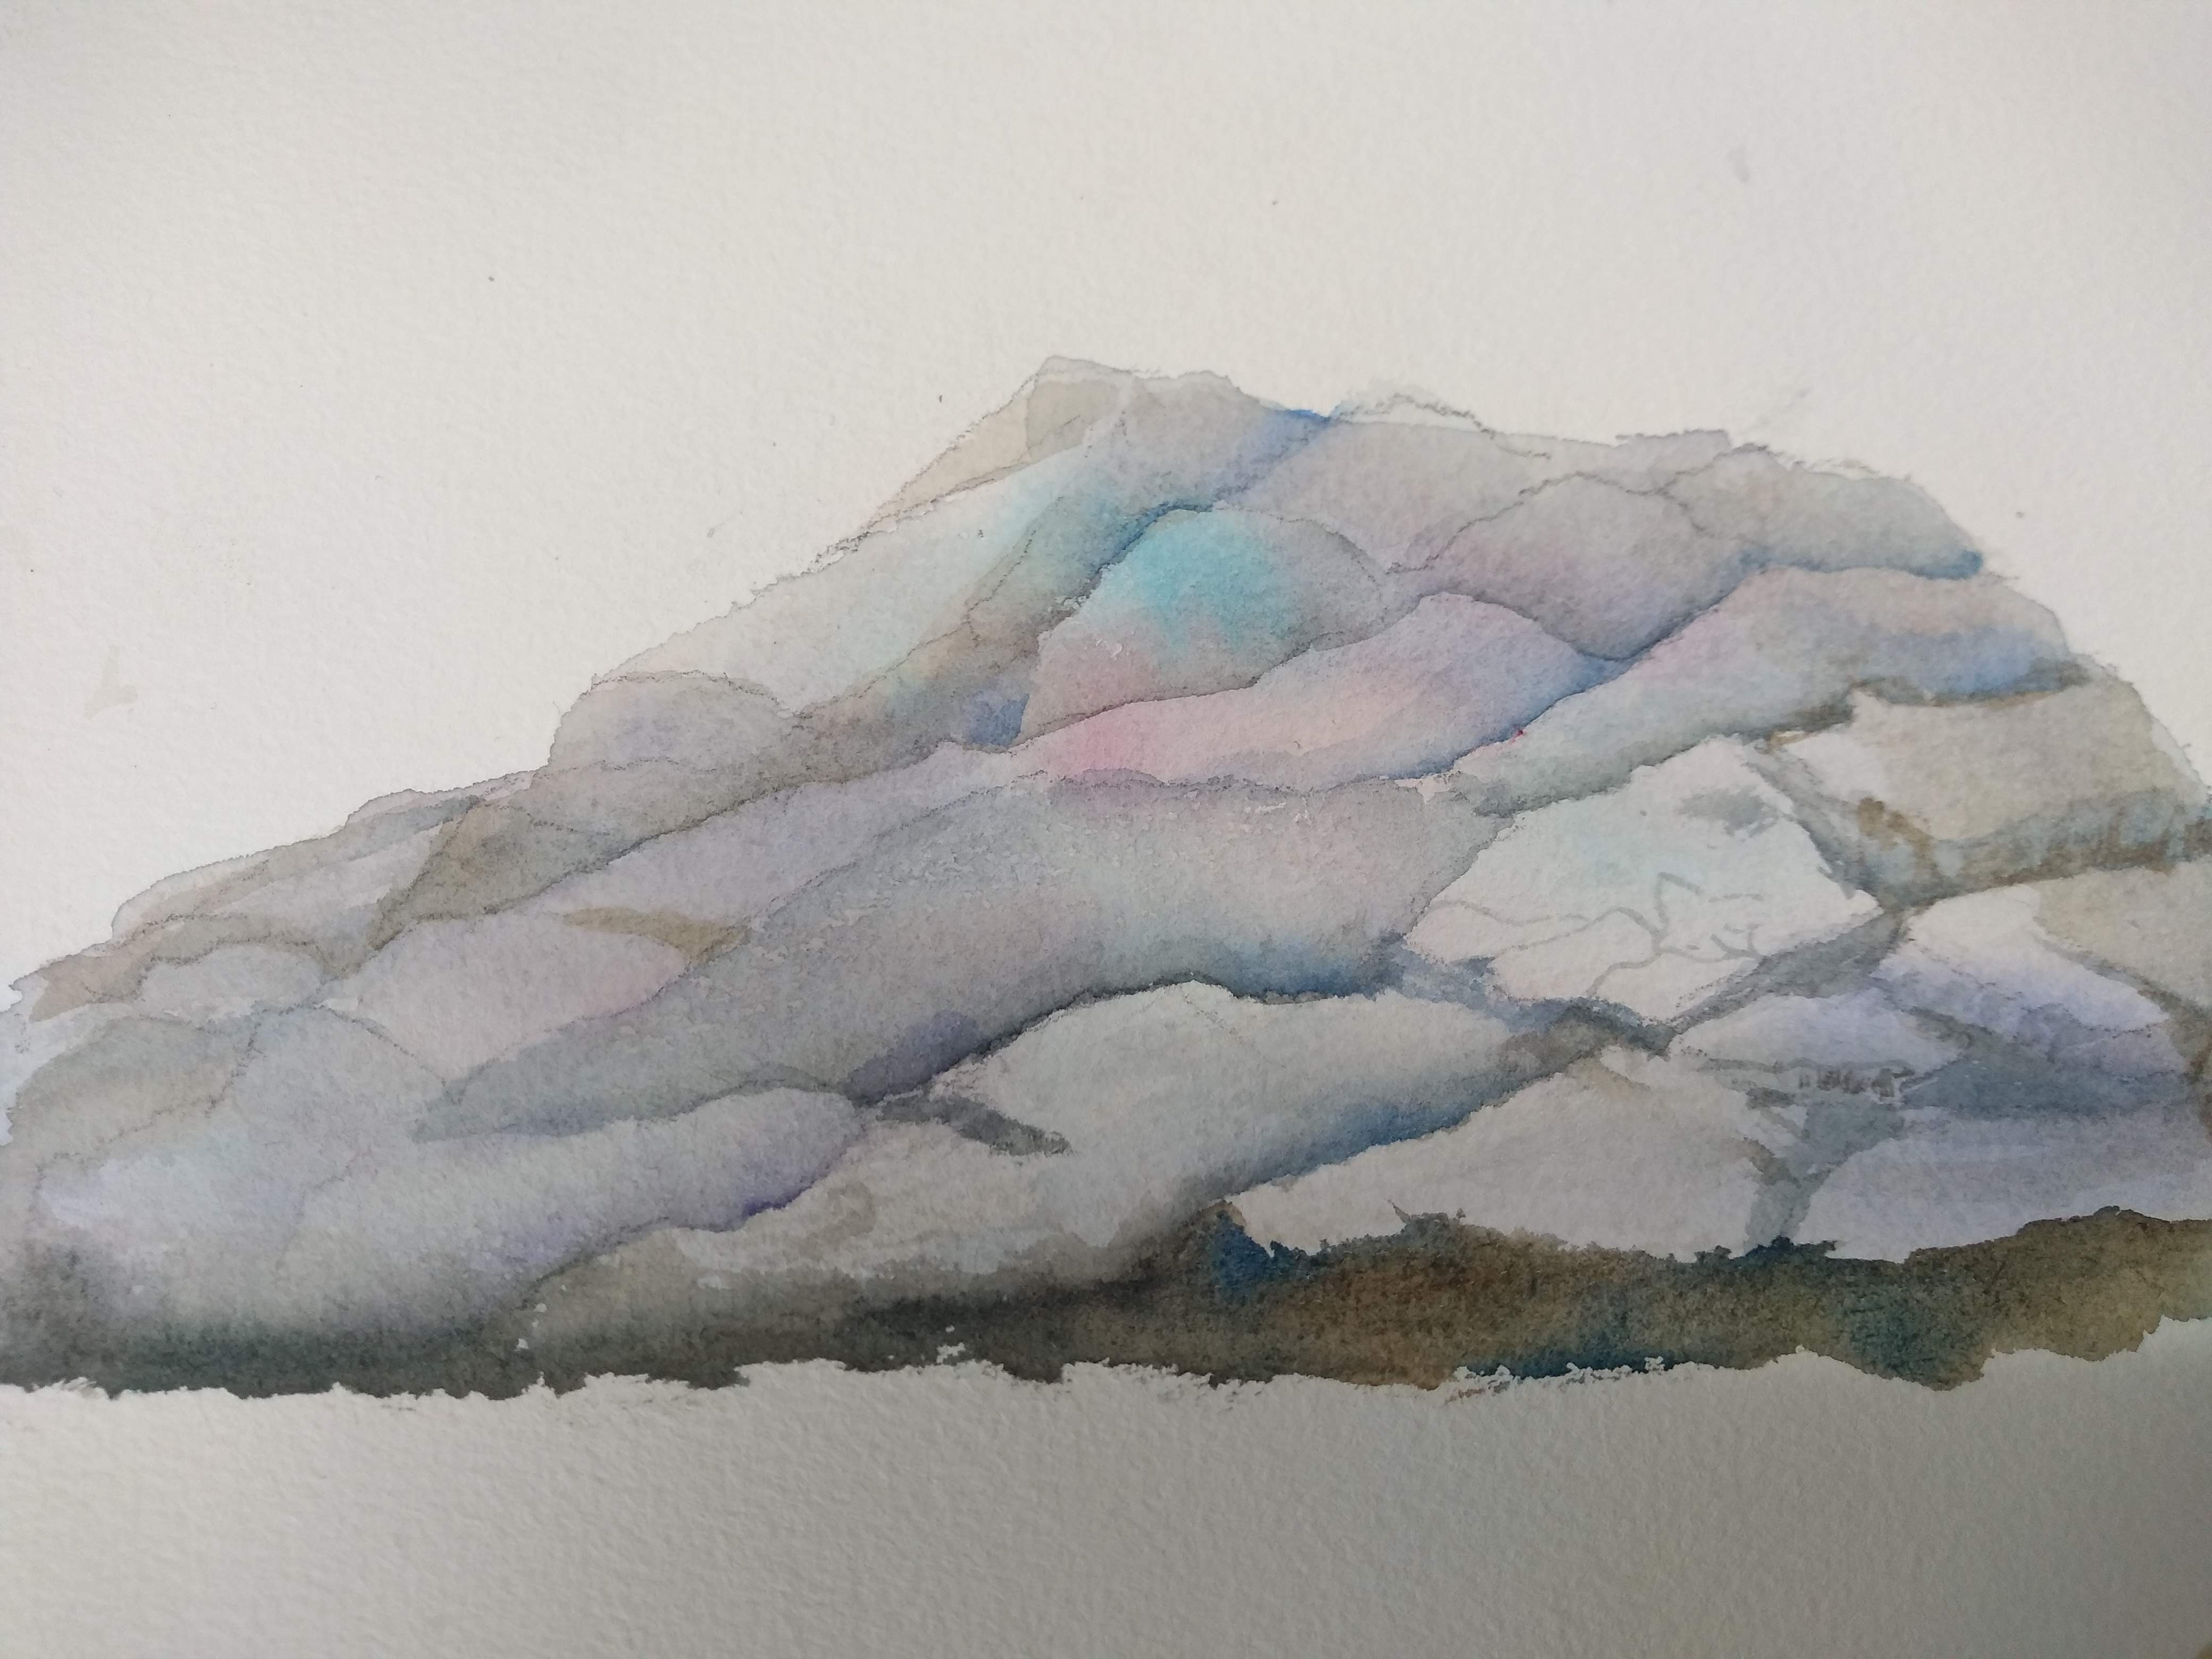
Mound of rocks using negative painting.
What I like about this method is that you do all your main color and texture at one time.
First paint the entire area with colors you like/see in the mound. You can use wax resist, wet spatter, water droplets, alcohol, or wax paper to create your texture at this point. Dry.

Draw in the rock formations. Then, beginning at the bottom, paint the negative spaces between the rocks. Apply the darkest paint at the bottom of a rock, clean the brush, and gently soften the paint into the rock above.
Do this with all the rocks, and then add a few details.
INVENTING YOUR OWN ROCK FORMATIONS
This is a good exercise I got from Joye Moon's book, Exploring Textures. Gordon MacKenzie has a similar exercise in his book The Complete Watercolorist's Essential Notebook.
Start by painting triangles wherever you like: long and rounded triangles, big and small triangles.
Paint circles to connect the triangles and identify rock shapes. You can paint more triangles as you go along to fill in rounded shapes. Think of the triangles as shadow shapes where two or three rocks come together.
Using dry brush or other methods, finish the rocks and contour them. Apply the darkest paint in shadow areas. You can even add small rocks inside the shadows. finish the rock by intensifying forms and shadows.
WAX PAPER CUT
This is a pretty way to make rock forms, especially those you see underwater.
Simply make a wet into wet wash, dropping in colors you like. I did this the same way I did the background for bokeh...in little circles of color. While wet, lay cut circles of wax paper over the paint. It should stick on its own if the paint is wet. Weight them down if necessary. Allow it to dry on its own and remove the wax paper.


No comments:
Post a Comment