SECRETS TO CREATING A BOKEH EFFECT
Bokeh is a photography term used to describe a soft, out-of-focus background. There are often round circles of sunlight in it.
I've tried several different techniques for creating bokeh in watercolor, and have been mostly successful. After watching a Karen Rice method of doing it, I decided to add that to my repertoire, with a few changes.
The two main things I learned were:
A. Use only lifting colors (I'll list some of them below)
B. Apply background colors in circles, wet into wet.
Step One: Wet the background (shiny, not puddly), and start applying color in circular shapes.

Keep adding colors, also in circular shapes. These are lifting not staining colors. For this exercise, I used veridian, cerulean blue, Hansa Yellow, and Quinacridone gold.

As it dries, after it has lost its shine but before completely dry, spritz a few drops of water over the paint.
This is not squirting it to soak it, but sprinkling a few drops on to create small soft effects. (See the little snowy drops?) You can just make drops from the tip of a brush instead.

Next use a template or stencil with different sizes of circles. You can buy one or you can
use a piece of yupo (or other thin plastic sheet) and punch circles in it. Lay the stencil over
the dried painting where you want a circle. Use a soft sponge (or even a Mr. Clean sponge) to gently lift circles. Blot the area with a paper towel or tissue. Overlap some circles. Don't overdo it.
Below you'll see some circle stencils (courtesy of Dollar Tree) next to a piece of white yupo and a hole punch.

Below you'll see bokeh done in different colors, and listing some possible lifting colors you can use. (The ones I used are highlighted)
For Blue: Cobalt, teal, cerulean, cobalt violet, ultramarine turquoise
For red/orange: Quin. coral, burnt umber, magenta, quin gold, hansa yellow, quin burnt scarlet
(I did use magenta, which is slightly staining, but mixed with all lifting colors, it's OK)
For yellow/orange: Quin gold, hansa yellow, burnt sienna, burnt umber, quin burnt orange, Transparent pyrol orange
For green: Hansa yellow, veridian, hookers green, cobalt blue, cerulean blue, quin gold

Starting to paint the bird

I got this photo reference from Paint My Photo by Chrissy M.(It is a red bellied nuthatch)
Sketch the bird and tree trunk onto 100% cotton paper. Put small bits of masking on the dot on the eye, the beak, and a few tiny feathers on the wings. (Karen Rice uses a paperclip to make the small liles of masking) Use an old sponge to mask on bits of rough bark up and down the tree trunk. (When the masking tried, I roughed it up by rubbing my finger through it.)
Choose the color scheme you want for the background, and wet the background, avoiding the bird. Do one side of background (beside the tree trunk) at a time, so your paper doesn't dry before you are ready.
Apply the paint as described above.
DRY the background.
In class I went ahead and demonstrated the bokeh, Using circle stencils in several sizes to lift the bokeh. Overlap some of them. Make some more white and distinct than others to increase the feeling of depth. But I'd prefer doing it after painting the bird and trunk.
TRUNK
Remember, there are patches of miskit on the trunk, roughed up a bit. Don't allow it to be in "chunks," as it needs to look rough for the bark.
I used a mixture of quin gold and ultramarine to create the mossy green. I wet the trunk, then painted in the greens on the left hand side, using the point of a credit card (or other sharp object, like bamboo pen) to pull out strands of green to look like moss. While it was wet, I then painted burnt umber and burnt sienna, allowing it to blend into some of the green.
Before it dried, I used the point of a credit card to create some ridges of bark, indenting the paper in ragged lines.
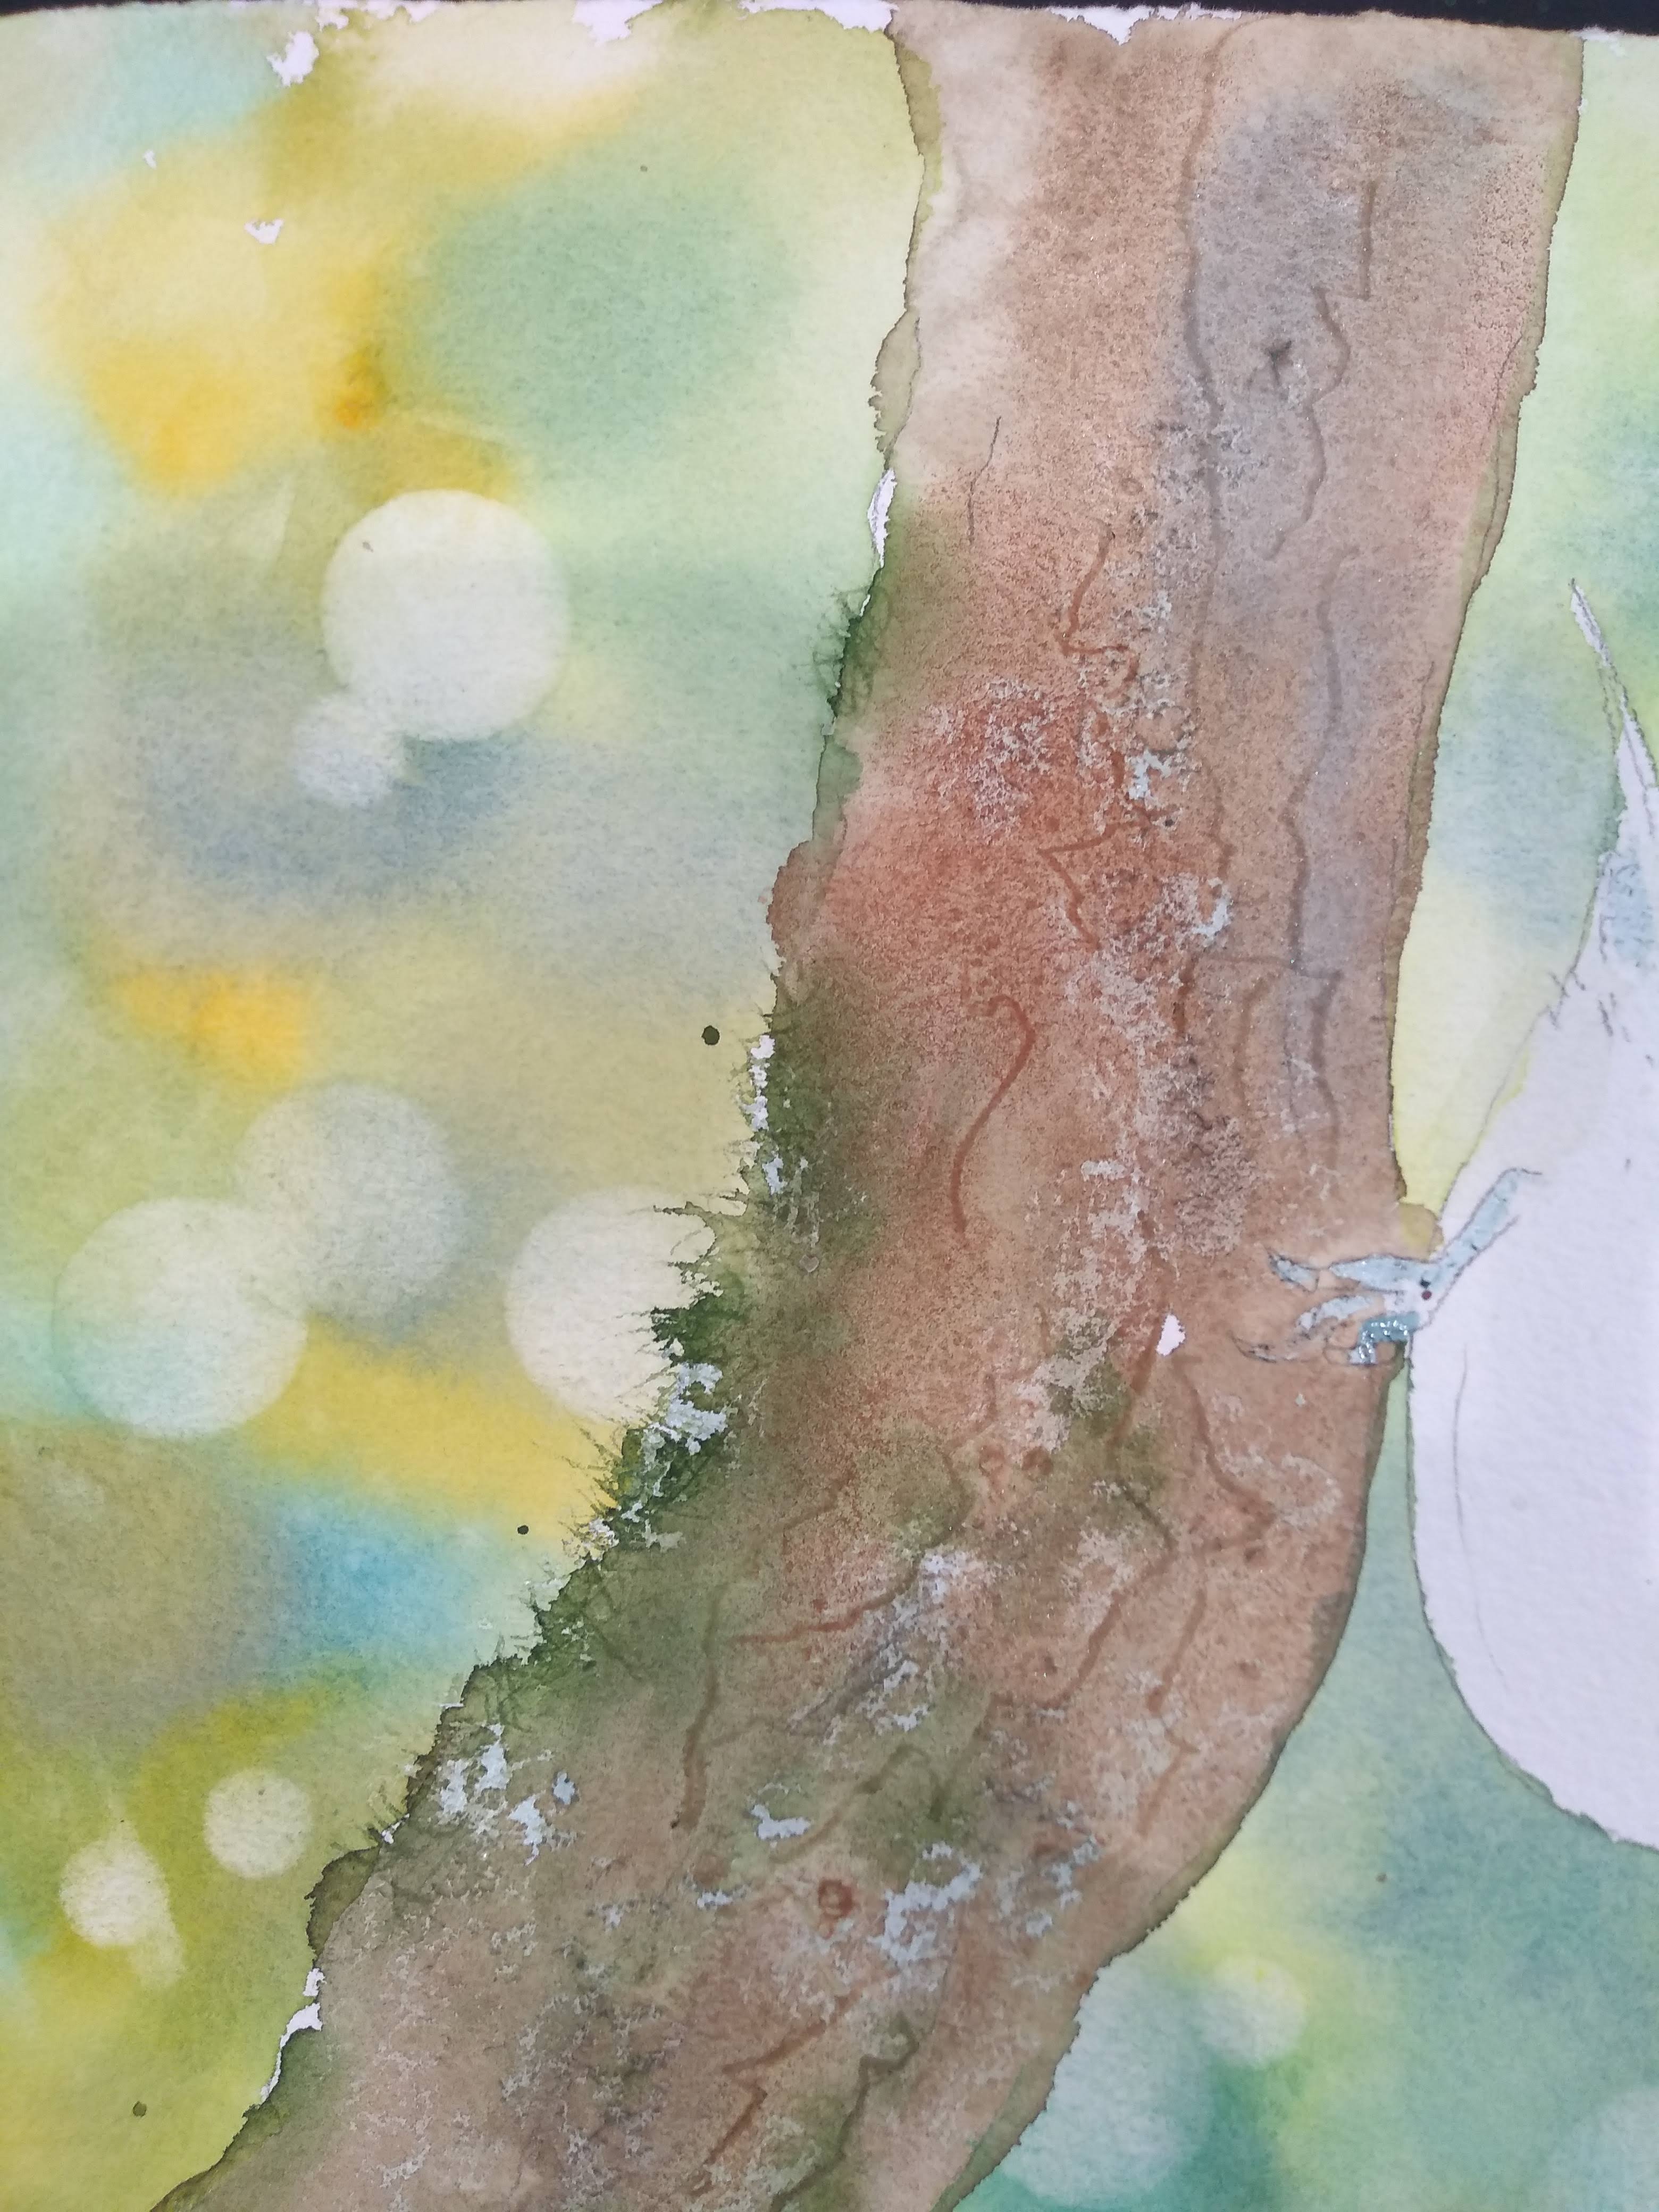
Dry the trunk.
Remove the masking fluid.

There will be some hard edges, which I want, but I don't want the white. Using gray (paynes or neutral tint) or burnt umber, lightly wash over the entire trunk. Drop in darks (greens and browns) to enhance the feeling of bark.
I went a little further to enhance the feeling of bark, but you don't have to. I painted in some dark, small lines to indicate the bark. I also added some more greens where I thought they got lost.
Two other things you can do are: scrape areas of the bark with a craft knife blade; and use some pastel in areas to make it look like bark.


THE BIRD
I still have masking fluid on the bird. I used cobalt grayed down with a little burnt sienna for the top of the bird.
I made an underpainting of gray on the belly of the bird, rounding it with some shading.

After it dried, I glazed over with some orange. I painted the black over the beak and the eye with neutral tint mixed with ultramarine blue. I waited until it was dry to paint the foot. (cobalt blue grayed with burnt sienna)
To finish, I painted in some thin dark feathers and the seed in his mouth. I also deepened the blue on his shoulder and near the beak to round the head a little bit more.

Before I added the bokeh by lifting circles, I made sure the colors surrounding the bird were the value I wanted. I wanted them a little darker around the belly so that the belly would show up better. It could be a little lighter over the head and back because that area of the bird is darker. If I need to darken an area of the background, I have to do it before I start adding circles.

No comments:
Post a Comment